
How to Choose the Right Drop In Anchors?

Time:2026-11-05 Author:Sienna
0%

Choosing the right Drop In Anchors starts with the concrete, not the catalog. A ceiling-mounted pipe support and a base plate near a slab edge face different loads and installation risks. The anchor must suit the concrete strength, thickness, condition, and required embedment. Small details matter.

Professional guidance helps turn those details into checks. ACI 318-19, Chapter 17, sets out design requirements for concrete anchors, including tension, shear, edge distance, and spacing. ACI 355.2-22 covers qualification testing for post-installed mechanical anchors. ASTM E488/E488M describes strength testing of anchors in concrete and masonry. For product-specific evidence, ICC-ES AC193 evaluation reports provide tested performance information for qualifying mechanical anchors. These documents are useful references, but their values apply to the products and conditions stated—not automatically to every job.

Before comparing sizes, confirm the anchor’s diameter, hole depth, and installation method against its technical documentation. Check whether the design involves cracked concrete, vibration, moisture, or close edge distances. A drill hole that is too shallow, dusty, or oversized can undermine an otherwise suitable choice. Even experienced crews can miss this. And a published load rating is not a substitute for checking the actual substrate and design conditions. This guide explains how to compare Drop In Anchors using application needs, credible test data, and practical installation checks, while recognizing that real site conditions are not always as tidy as the drawings.
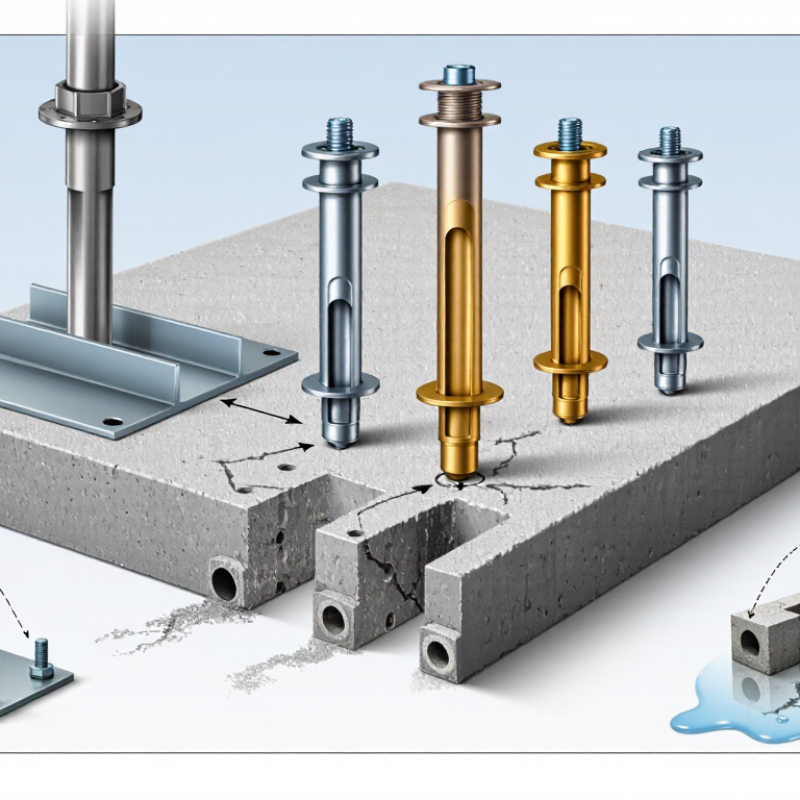
How to Choose the Right Drop In Anchors?

Understanding How Drop-In Anchors Work

A drop-in anchor is a steel sleeve with an internal thread and an expansion plug. It is designed for solid concrete, not hollow block. After drilling and cleaning a hole, the installer inserts the anchor and drives the plug with a setting tool. The plug pushes the sleeve outward, creating friction against the hole wall. The bolt can then be removed without removing the anchor.

Small details matter. A dusty hole can weaken the grip, while an anchor set too shallow may not expand properly. ACI 355.2-22 evaluates post-installed mechanical anchors through tests that include tension and shear loading in cracked and uncracked concrete. ACI 318, Chapter 17, then guides design checks for failure modes such as concrete breakout and pullout. These standards show why “same diameter” does not mean “same capacity.”

Check the anchor’s evaluation report for actual load data. ICC-ES reports typically list design values by concrete strength, embedment depth, and edge distance. A fitting near a slab edge may carry less load than one well inside the slab. I still find hole cleaning easy to underestimate; it is a small step with real consequences. Use the specified drill size and setting tool, and verify the required embedment before loading the connection.

How to Choose the Right Drop In Anchors? - Understanding How Drop-In Anchors Work

Anchor Size Typical Drill-Bit Diameter Matching Thread Size How It Works Selection and Installation Notes
1/4 in (6.4 mm) 3/8 in (9.5 mm) 1/4-20 UNC A setting tool drives the internal expander, pressing the anchor sleeve against the concrete wall. Suitable only where the required load capacity and concrete conditions are covered by the anchor’s published specifications.
3/8 in (9.5 mm) 1/2 in (12.7 mm) 3/8-16 UNC The anchor is installed flush in a predrilled hole; a threaded rod or bolt can then be screwed into its internal thread. Check required embedment, edge distance, spacing, and concrete strength before choosing this size.
1/2 in (12.7 mm) 5/8 in (15.9 mm) 1/2-13 UNC Expansion creates friction against the sides of the hole, helping hold the anchor in solid concrete. Use in sound, solid concrete unless the product documentation explicitly permits another base material.
5/8 in (15.9 mm) 7/8 in (22.2 mm) 5/8-11 UNC Once set, the anchor provides an internal threaded connection for removable or replaceable attachments. Confirm that the hole depth allows the anchor to sit flush and that dust is removed before setting.
3/4 in (19.1 mm) 1 in (25.4 mm) 3/4-10 UNC A larger anchor size accepts a larger threaded fastener, but its actual capacity depends on the installation and the specific product. Check the manufacturer’s load tables and installation instructions; do not estimate capacity from diameter alone.

Note: Drill sizes shown are common for these nominal anchor sizes; dimensions can vary by product. Drop-in anchors are generally intended for solid concrete, not hollow block or brick. Drill to the specified depth, clean the hole, set the anchor with the correct setting tool, and follow the product’s instructions and load data.

Assessing the Base Material and Load Requirements

Drop-in anchors are designed for solid concrete, but not every slab behaves alike. Check whether the concrete is cracked, its thickness, and its condition near the installation point. A thin slab, weak surface, or nearby edge can reduce reliable capacity. Drawings or test records may help; visual inspection alone cannot reveal everything. That matters. Follow the anchor’s published requirements for hole diameter, embedment, spacing, and edge distance.

Define the load before choosing an anchor size. Consider tension pulling outward, shear across the fastener, and combinations of both. Vibration or repeated loading may affect selection, even when the fixture seems light. Compare the design demand with rated capacity for the actual concrete condition, not just a headline value. Allow for required safety factors, and seek qualified engineering advice for critical overhead or structural connections. A clean, correctly drilled hole and the proper setting tool also matter; installation errors are easy to miss. I would double-check assumptions, especially concrete strength, because site notes are sometimes incomplete.

Choosing Anchor Size, Material, and Finish

Choosing the right drop-in anchor starts with the load and the concrete, not just the bolt diameter. Match the anchor’s internal thread to the fastener, then check its approved embedment depth, minimum spacing, and edge distance. These values vary by anchor and concrete strength. A hole too shallow can leave the anchor proud; one drilled too wide may reduce holding capacity. Check the product’s evaluation report and installation instructions before drilling. Small details matter.

Material and finish should suit the environment. Carbon steel with a zinc coating is often considered for dry indoor locations, while damp, coastal, or chemical-exposure areas may call for stainless steel or another corrosion-resistant option. The NACE International IMPACT study estimated corrosion costs at US$2.5 trillion annually, or 3.4% of global GDP. That figure covers many industries, but it shows why corrosion protection deserves attention even on a small fastening job. Avoid mixing metals without checking compatibility. A finish can look sound and still be unsuitable.

One detail is easy to miss: the anchor expands against the concrete, so cracked, weak, or thin slabs can change performance. Confirm the base material and required load with a qualified professional when the installation is structural or safety-critical. I would double-check the hole diameter and depth before setting each anchor; it is a little tedious, but easier than correcting a loose connection later.

Checking Compatibility with the Fastener and Installation Tools

A drop-in anchor is only compatible when its internal thread matches the bolt or threaded rod exactly. Check thread diameter and pitch, then confirm the fastener’s length leaves enough room for the fixture and full engagement. A mismatch may feel secure at first. It may not be. ICC-ES evaluation reports list anchor capacities by diameter, embedment, and concrete condition; compare the exact configuration, not just the product name. ASTM E488/E488M provides test methods for anchor tension and shear performance, useful context when reviewing those published values.

The setting tool matters just as much. Match its size to the anchor, and use the specified tool to drive the expansion plug until properly set. A loose fit can deform the sleeve; a wrong tool can leave the anchor under-set. Check the hole diameter and depth, too, and clear out drilling dust before insertion. NRMCA’s CIP 35 guidance says that for specified concrete strengths up to 5,000 psi, no individual strength test should fall more than 500 psi below the specified strength; three consecutive tests should average at least that strength. This helps frame the base-material check, but it does not replace anchor-specific capacity data. I still recheck thread fit by hand. Small details get missed.

Verifying Installation Conditions and Safety Requirements

Before choosing a drop-in anchor, verify that the concrete suits the application. Check whether it is cracked or uncracked, its condition, and its thickness. The anchor’s published data should match the required load and installation setting. A dry indoor slab and a damp exterior surface are not interchangeable.

Measure the hole diameter and depth against the anchor instructions, not by eye. Use the specified drill bit, then remove dust with the recommended method. A hole can look clean and still hold debris. Set the anchor with its matching setting tool, and confirm that the lip sits flush with the concrete. This step is easy to rush; a partly expanded anchor may not perform as intended.

Check edge distances, anchor spacing, embedment, and nearby cracks before drilling. Keep clear of concealed pipes or wiring, and wear eye and hearing protection while drilling. If the load is overhead, dynamic, or safety-critical, get the design checked by a qualified professional. Do not assume a successful installation proves adequate capacity. Record the anchor type, hole dimensions, and installation checks; small details matter, though they can be tedious.

How to Choose the Right Drop-In Anchors? — Verifying Installation Conditions and Safety Requirements

Concrete Strength Classes: Characteristic Cylinder Strength

Concrete strength is one factor in anchor selection. The chart shows the first number in each EN 206 strength-class designation, measured in MPa. These values are not anchor load capacities: check the anchor’s technical approval and installation instructions for compatible concrete, embedment depth, hole size, edge distance, spacing, and minimum member thickness.

FAQS

What is a drop-in anchor designed for?

It is a steel sleeve with an internal thread and expansion plug. Use it in solid concrete, not hollow block.

How does the anchor hold inside concrete?

A setting tool drives the plug, pushing the sleeve outward against the hole wall. Friction helps hold it in place.

Can the bolt be removed later?

Yes. The bolt can be removed while the anchor stays embedded in the concrete.

What should I check before drilling?

Check concrete condition and thickness, plus cracks, edge distance, and anchor spacing. Locate concealed pipes and wiring. Measure carefully.

How should I prepare the hole?

Use the specified drill bit and hole depth. Remove dust with the recommended method; a hole can look clean and still contain debris.

How can I tell if the anchor is set properly?

Use the matching setting tool and check that the anchor lip sits flush with the concrete. A partly expanded anchor may not perform as intended.

Does an anchor’s diameter tell me its load capacity?

No. Capacity depends on factors such as concrete strength, embedment depth, and edge distance. Check the anchor’s published load data.

When should a qualified professional review the installation?

Seek a design check for overhead, dynamic, or safety-critical loads. A successful installation alone does not prove adequate capacity. I can still underestimate that detail.

Conclusion

Choosing the right Drop In Anchors starts with understanding how they work: the anchor is placed in a predrilled hole in solid base material, then expanded with a setting tool to create a secure internal connection. Before selecting one, assess the base material, its condition, and the loads the fastening point must support. The anchor’s size and capacity should suit both the material and the intended application.

Next, choose an anchor material and finish appropriate for the installation environment, and confirm that the threaded fastener matches the anchor’s specifications. Check that the available drill bit and setting tool are suitable for the anchor size. Finally, follow the installation instructions, prepare the hole correctly, and verify that the surrounding material and working conditions are safe. Careful selection and proper installation help create a reliable fastening connection.

Sienna

Sienna

Sienna is a skilled marketing professional with a deep expertise in our company’s core products and services. With a passion for innovation and detail, she plays a pivotal role in crafting insightful blog posts that not only highlight the unique features of our offerings but also provide valuable......